Home
› Diy Cutting T Shirt - Cool Fringe Top Diy T Shirt Cutting Tutorial Allriot - You can also cut a small apple shape for a cute look that would be an instant hit with girls.
Diy Cutting T Shirt - Cool Fringe Top Diy T Shirt Cutting Tutorial Allriot - You can also cut a small apple shape for a cute look that would be an instant hit with girls.
Diy Cutting T Shirt - Cool Fringe Top Diy T Shirt Cutting Tutorial Allriot - You can also cut a small apple shape for a cute look that would be an instant hit with girls.. See more ideas about cut shirts, diy clothes, diy fashion. Turn shirt inside out and lay on a flat surface. Learn how to cut the perfect off the shoulder, cold shoulder, and tie up tops every time. Cut the front like a tank by removing the sleeves and. Play around with the hem to make it cropped or even dress length to satisfy your style!
The thickness of the fringe does not matter but, the thinner the fringe, the better they look. Thereafter, cut out the fringes at the bottom side of the shirt. The fringes look very beautiful. You can't go wrong with diy t shirt. All you need is just scissors and imagination.
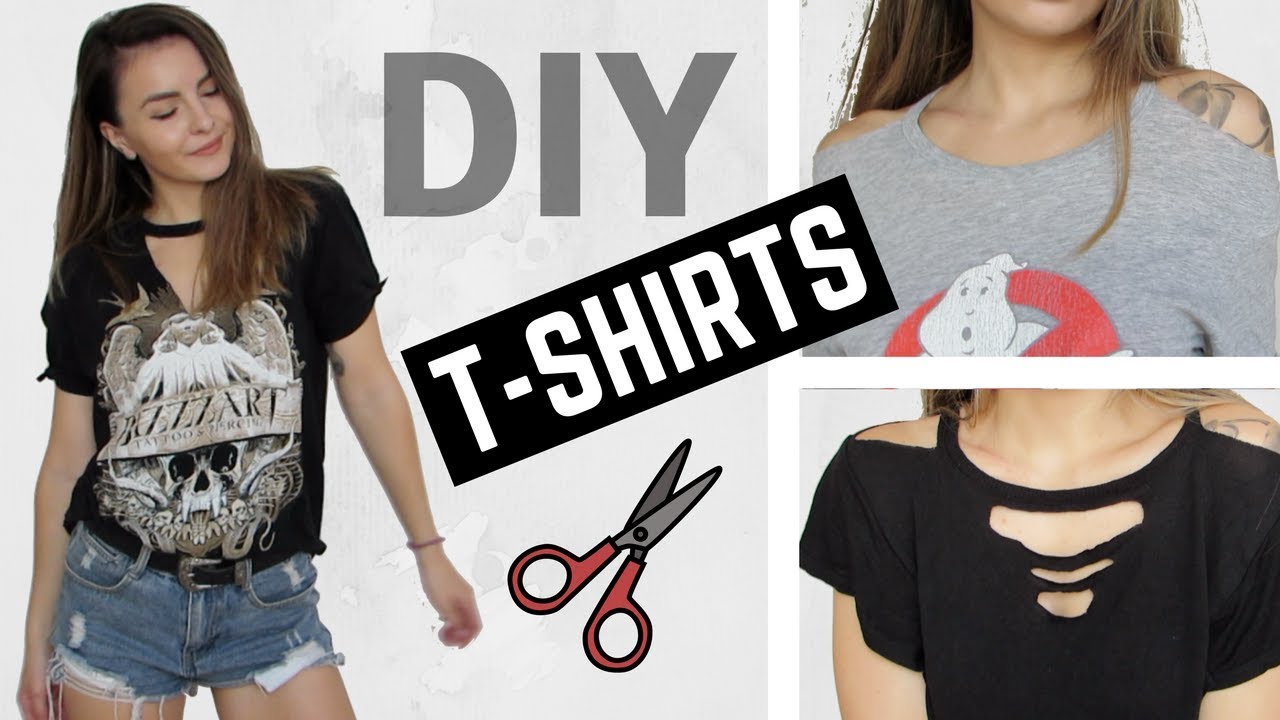
Cute And Easy Diy T Shirt Alterations from cdn.diys.com Or welcome back with three styles made easy. Simply cut the back out of a shirt, and then attach a bow which you can tie. A simple stretch will curl the edges attractively. Places to put these lines include the sides of the shirt, the shoulders, the tops of the arms, and even as a detail on the front. You only need to first cut off the neckline, arms and bottom hems. Maybe you want to get really snippy with one of your tank tops, and convert it into a faux designer crop top. Okay then' … continue reading simple but creative diy t shirt cutting ideas Place your scissors on the top of the shoulder, and cut in a line to the end point of your first cut on the front part of the collar.
Cut the diagonal line out of only the front part of the shirt.
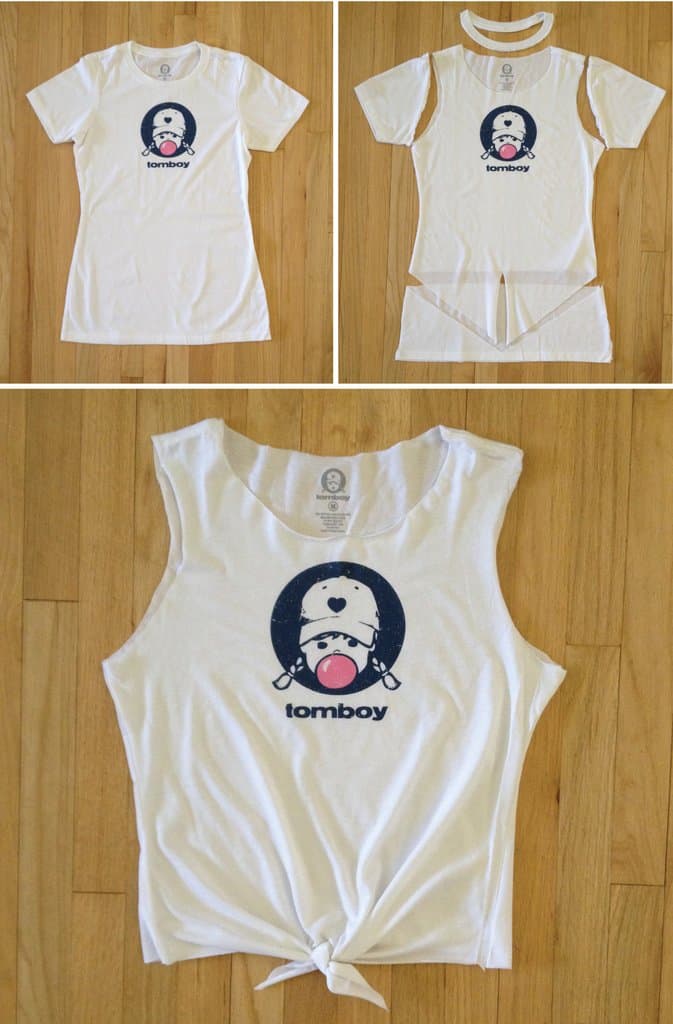
Once you've cut all you want, stretch it out. You don't want a jagged edge! Cut the diagonal line out of only the front part of the shirt. Thereafter, cut out the fringes at the bottom side of the shirt. Next, widen the neck and cut the hem into an asymmetric hemline, as shown in the picture below. Place your scissors on the top of the shoulder, and cut in a line to the end point of your first cut on the front part of the collar. The collar is optional…do not cut the back though. Cut too high and you're seeing some underboob, too low and it looks like you outgrew your childhood shirt. The fringes look very beautiful. A simple stretch will curl the edges attractively. Take a pen to mark the middle of the collar or eyeball it, and make a horizontal cut right underneath. I usually start by the arm seam. All you need is just scissors and imagination.
Next, widen the neck and cut the hem into an asymmetric hemline, as shown in the picture below. You can't go wrong with diy t shirt. Turn shirt inside out and lay on a flat surface. You can also cut a small apple shape for a cute look that would be an instant hit with girls. The larger the dress are the more length you can have to work with which is really good.
Diy Distressed Cut Out T Shirts Owlipop Youtube from i.ytimg.com Cut the diagonal line out of only the front part of the shirt. The larger the dress are the more length you can have to work with which is really good. Okay then' … continue reading simple but creative diy t shirt cutting ideas I really like this idea from pink ice: Cut a diagonal line from the marked spot to your first cut at the collar. Once done, at the back, gather the cut sleeves to the centre and seal it with a ribbon. Place your scissors on the top of the shoulder, and cut in a line to the end point of your first cut on the front part of the collar. I usually start by the arm seam.
Places to put these lines include the sides of the shirt, the shoulders, the tops of the arms, and even as a detail on the front.
Once you've cut all you want, stretch it out. You can go with any color or pattern fabric you want for the bow, so this is a good way to add some color and fun to an otherwise plain shirt. Simply cut the back out of a shirt, and then attach a bow which you can tie. 2 simple neck cut out shirt this is a very simple cut you can do along the neckline. Turn shirt inside out and lay on a flat surface. Lay the shirt out flat, making sure the seams are aligned and laying straight. I really like this idea from pink ice: Or welcome back with three styles made easy. It is of your choice. The length of the fringes is not restricted; You don't want a jagged edge! Maybe you want to get really snippy with one of your tank tops, and convert it into a faux designer crop top. Play around with the hem to make it cropped or even dress length to satisfy your style!
Cut off the collar directly underneath the seam. I usually start by the arm seam. Once done, at the back, gather the cut sleeves to the centre and seal it with a ribbon. The thickness of the fringe does not matter but, the thinner the fringe, the better they look. Make sure the front is facing up.
Pin On Sewing from i.pinimg.com Once done, at the back, gather the cut sleeves to the centre and seal it with a ribbon. Play around with the hem to make it cropped or even dress length to satisfy your style! The collar is optional…do not cut the back though. Thereafter, cut out the fringes at the bottom side of the shirt. Cut the diagonal line out of only the front part of the shirt. This method works best if you are not using ribbed material. Cut the shirt in smooth, clean lines. You only need to first cut off the neckline, arms and bottom hems.
With a pencil, draw lightly on the shirt where you want to make the cuts—they can be vertical, horizontal, diagonal, whatever you choose.
Lay the shirt out flat, making sure the seams are aligned and laying straight. Next, widen the neck and cut the hem into an asymmetric hemline, as shown in the picture below. You don't want a jagged edge! You can't go wrong with diy t shirt. Cut a diagonal line from the marked spot to your first cut at the collar. The larger the dress are the more length you can have to work with which is really good. Once you've cut all you want, stretch it out. The fringes look very beautiful. You only need to first cut off the neckline, arms and bottom hems. I usually start by the arm seam. Maybe you want to get really snippy with one of your tank tops, and convert it into a faux designer crop top. Turn shirt inside out and lay on a flat surface. Make sure the front is facing up.